HowTo: Windows 7 PPTP VPN Setup
Setting up ItsVPN! with PPTP access under Windows 7 is simple. The following instructions go step-by-step through the creation process of a PPTP connection.
Open Network Connections
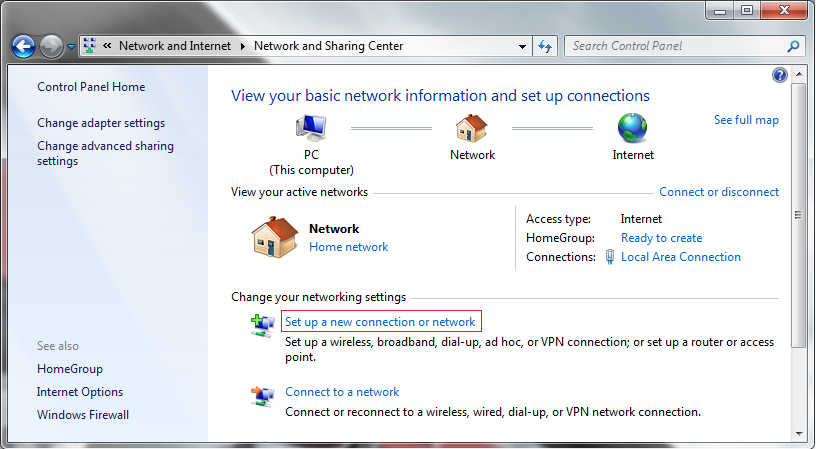
First, Open Network and Sharing Center from Control Panel. Then choose Set up a new connection or network.
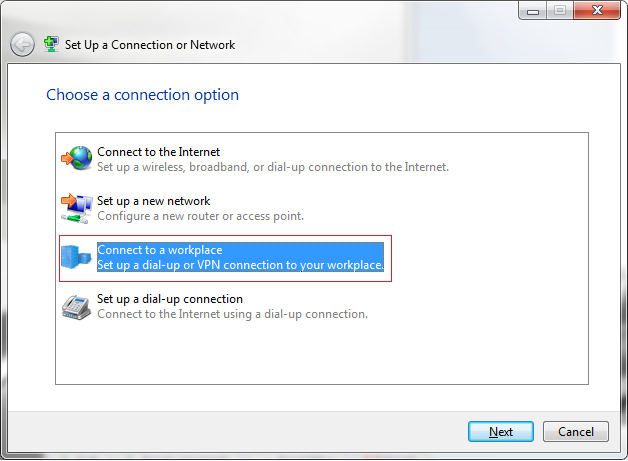
In the next window, choose Connect to a workplace.
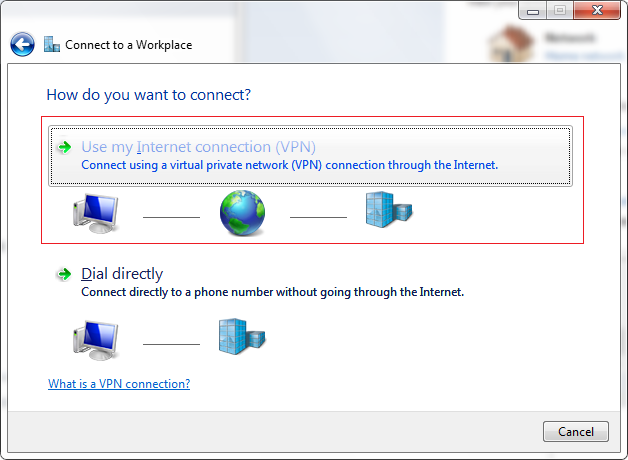
In the next window, choose Use my Internet Connection (VPN).
Type in the name or the IP address of a ItsVPN! server. Check the info on your ItsVPN! account page. There you will find the available server(s).
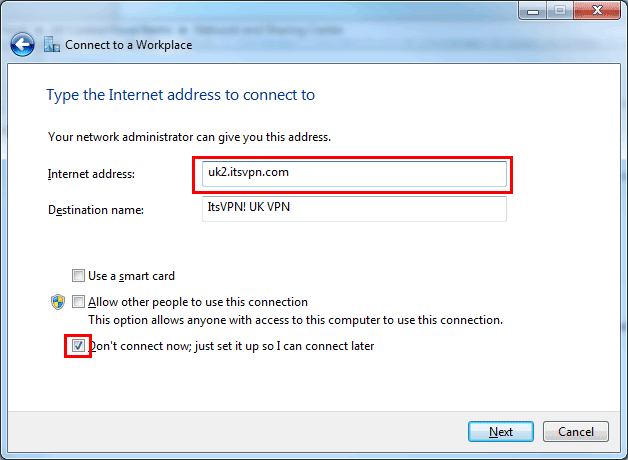
Then enter ItsVPN! as the name the connection in the destination name box (you can name it as you want).
Check the checkbox to not connect now, Then click Next.
In the next window, enter your user name and password for your ItsVPN! account. And click Create.
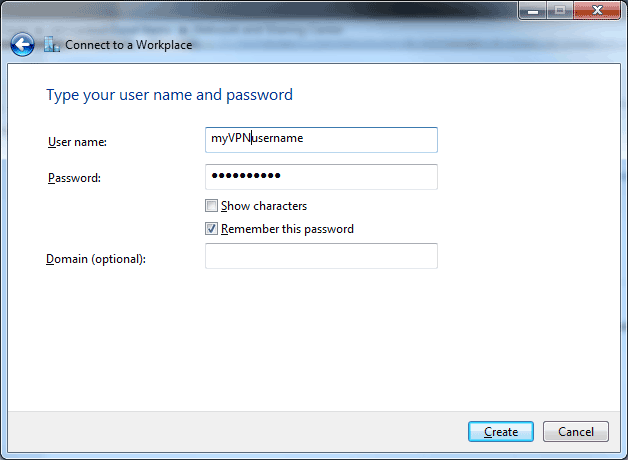
You’re all set if you see the next window as below.
You should see this screen next. Click the “Close” button to return to the “Network and Internet” screen.
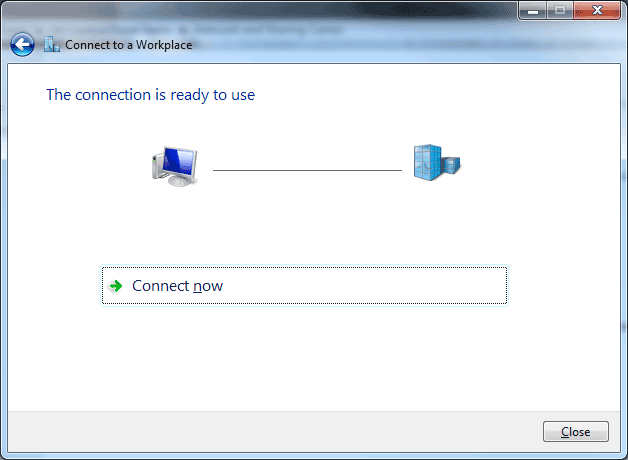
In the Connect to a network screen, you should see the ItsVPN! connection that you have just set up:
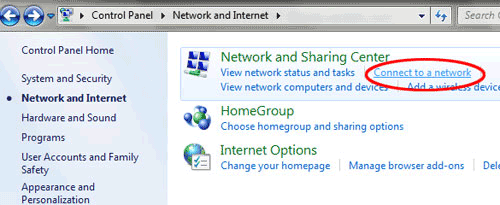
Then this will pop up:
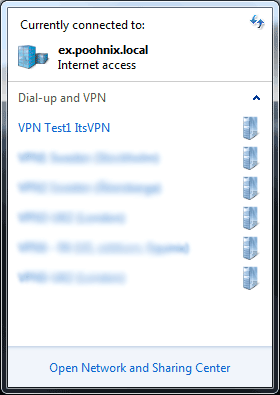
In order to connect/disconnect to ItsVPN! click on the connection listing and select connect/disconnect.
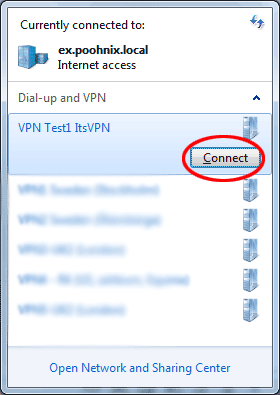
Disconnect From ItsVPN!
To disconnect from a VPN connection, click the row for the active connection, and then click “Disconnect”.
“Quick” Connect/Disconnect
In order to reach the connection list quickly, without the roundabout way via the Control Panel, you can click on the networking icon in the system tray: (circled)

If the networking Icon isn’t immediately visible, click on the small upward-pointing triangle (shown by a red arrow in the picture), to sho all system tray icons.
Important! If you have problems with DNS resolution please also read this post: DNS Issues On PPTP VPN Connect.
If you have problems connecting to our VPN server please take a look at our knowledge base before contacting support.
